


Browser Mode
This page provides information about the browser mode feature in the Vitest API, which allows you to run your tests in the browser natively, providing access to browser globals like window and document.
TIP
If you are looking for documentation for expect, vi or any general API like test projects or type testing, refer to the "Getting Started" guide.
Installation
For easier setup, you can use vitest init browser command to install required dependencies and create browser configuration.
npx vitest init browseryarn exec vitest init browserpnpx vitest init browserbunx vitest init browserManual Installation
You can also install packages manually. Vitest always requires a provider to be defined. You can chose either preview, playwright or webdriverio.
If you want to just preview how your tests look, you can use the preview provider:
npm install -D vitest @vitest/browser-previewyarn add -D vitest @vitest/browser-previewpnpm add -D vitest @vitest/browser-previewbun add -D vitest @vitest/browser-previewWARNING
However, to run tests in CI you need to install either playwright or webdriverio. We also recommend switching to either one of them for testing locally instead of using the default preview provider since it relies on simulating events instead of using Chrome DevTools Protocol.
If you don't already use one of these tools, we recommend starting with Playwright because it supports parallel execution, which makes your tests run faster.
Playwright is a framework for Web Testing and Automation.
npm install -D vitest @vitest/browser-playwrightyarn add -D vitest @vitest/browser-playwrightpnpm add -D vitest @vitest/browser-playwrightbun add -D vitest @vitest/browser-playwrightConfiguration
To activate browser mode in your Vitest configuration, set the browser.enabled field to true in your Vitest configuration file. Here is an example configuration using the browser field:
import { defineConfig } from 'vitest/config'
import { playwright } from '@vitest/browser-playwright'

export default defineConfig({
  test: {
    browser: {
      provider: playwright(),
      enabled: true,
      // at least one instance is required
      instances: [
        { browser: 'chromium' },
      ],
    },
  }
})
INFO
Vitest assigns port 63315 to avoid conflicts with the development server, allowing you to run both in parallel. You can change that with the browser.api option.
The CLI does not print the Vite server URL automatically. You can press "b" to print the URL when running in watch mode.
If you have not used Vite before, make sure you have your framework's plugin installed and specified in the config. Some frameworks might require extra configuration to work - check their Vite related documentation to be sure.
import { defineConfig } from 'vitest/config'
import react from '@vitejs/plugin-react'
import { playwright } from '@vitest/browser-playwright'

export default defineConfig({
  plugins: [react()],
  test: {
    browser: {
      enabled: true,
      provider: playwright(),
      instances: [
        { browser: 'chromium' },
      ],
    }
  }
})import { defineConfig } from 'vitest/config'
import { playwright } from '@vitest/browser-playwright'
import vue from '@vitejs/plugin-vue'
export default defineConfig({
plugins: [vue()],
test: {
browser: {
enabled: true,
provider: playwright(),
instances: [
{ browser: 'chromium' },
],
}
}
})import { defineConfig } from 'vitest/config'
import { svelte } from '@sveltejs/vite-plugin-svelte'
import { playwright } from '@vitest/browser-playwright'
export default defineConfig({
plugins: [svelte()],
test: {
browser: {
enabled: true,
provider: playwright(),
instances: [
{ browser: 'chromium' },
],
}
}
})import { defineConfig } from 'vitest/config'
import solidPlugin from 'vite-plugin-solid'
import { playwright } from '@vitest/browser-playwright'
export default defineConfig({
plugins: [solidPlugin()],
test: {
browser: {
enabled: true,
provider: playwright(),
instances: [
{ browser: 'chromium' },
],
}
}
})import { defineConfig } from 'vitest/config'
import marko from '@marko/vite'
import { playwright } from '@vitest/browser-playwright'
export default defineConfig({
plugins: [marko()],
test: {
browser: {
enabled: true,
provider: playwright(),
instances: [
{ browser: 'chromium' },
],
}
}
})import { defineConfig } from 'vitest/config'
import { qwikVite } from '@builder.io/qwik/optimizer'
import { playwright } from '@vitest/browser-playwright'
// optional, run the tests in SSR mode
import { testSSR } from 'vitest-browser-qwik/ssr-plugin'
export default defineConfig({
plugins: [testSSR(), qwikVite()],
test: {
browser: {
enabled: true,
provider: playwright(),
instances: [{ browser: 'chromium' }]
},
},
})If you need to run some tests using Node-based runner, you can define a projects option with separate configurations for different testing strategies:
import { defineConfig } from 'vitest/config'
import { playwright } from '@vitest/browser-playwright'

export default defineConfig({
  test: {
    projects: [
      {
        test: {
          // an example of file based convention,
          // you don't have to follow it
          include: [
            'tests/unit/**/*.{test,spec}.ts',
            'tests/**/*.unit.{test,spec}.ts',
          ],
          name: 'unit',
          environment: 'node',
        },
      },
      {
        test: {
          // an example of file based convention,
          // you don't have to follow it
          include: [
            'tests/browser/**/*.{test,spec}.ts',
            'tests/**/*.browser.{test,spec}.ts',
          ],
          name: 'browser',
          browser: {
            enabled: true,
            provider: playwright(),
            instances: [
              { browser: 'chromium' },
            ],
          },
        },
      },
    ],
  },
})
Browser Option Types
The browser option in Vitest depends on the provider. Vitest will fail, if you pass --browser and don't specify its name in the config file. Available options:
webdriveriosupports these browsers:firefoxchromeedgesafari
playwrightsupports these browsers:firefoxwebkitchromium
Browser Compatibility
Vitest uses Vite dev server to run your tests, so we only support features specified in the esbuild.target option (esnext by default).
By default, Vite targets browsers which support the native ES Modules, native ESM dynamic import, and import.meta. On top of that, we utilize BroadcastChannel to communicate between iframes:
- Chrome >=87
- Firefox >=78
- Safari >=15.4
- Edge >=88
Running Tests
When you specify a browser name in the browser option, Vitest will try to run the specified browser using preview by default, and then run the tests there. If you don't want to use preview, you can configure the custom browser provider by using browser.provider option.
To specify a browser using the CLI, use the --browser flag followed by the browser name, like this:
npx vitest --browser=chromiumOr you can provide browser options to CLI with dot notation:
npx vitest --browser.headlessWARNING
Since Vitest 3.2, if you don't have the browser option in your config but specify the --browser flag, Vitest will fail because it can't assume that config is meant for the browser and not Node.js tests.
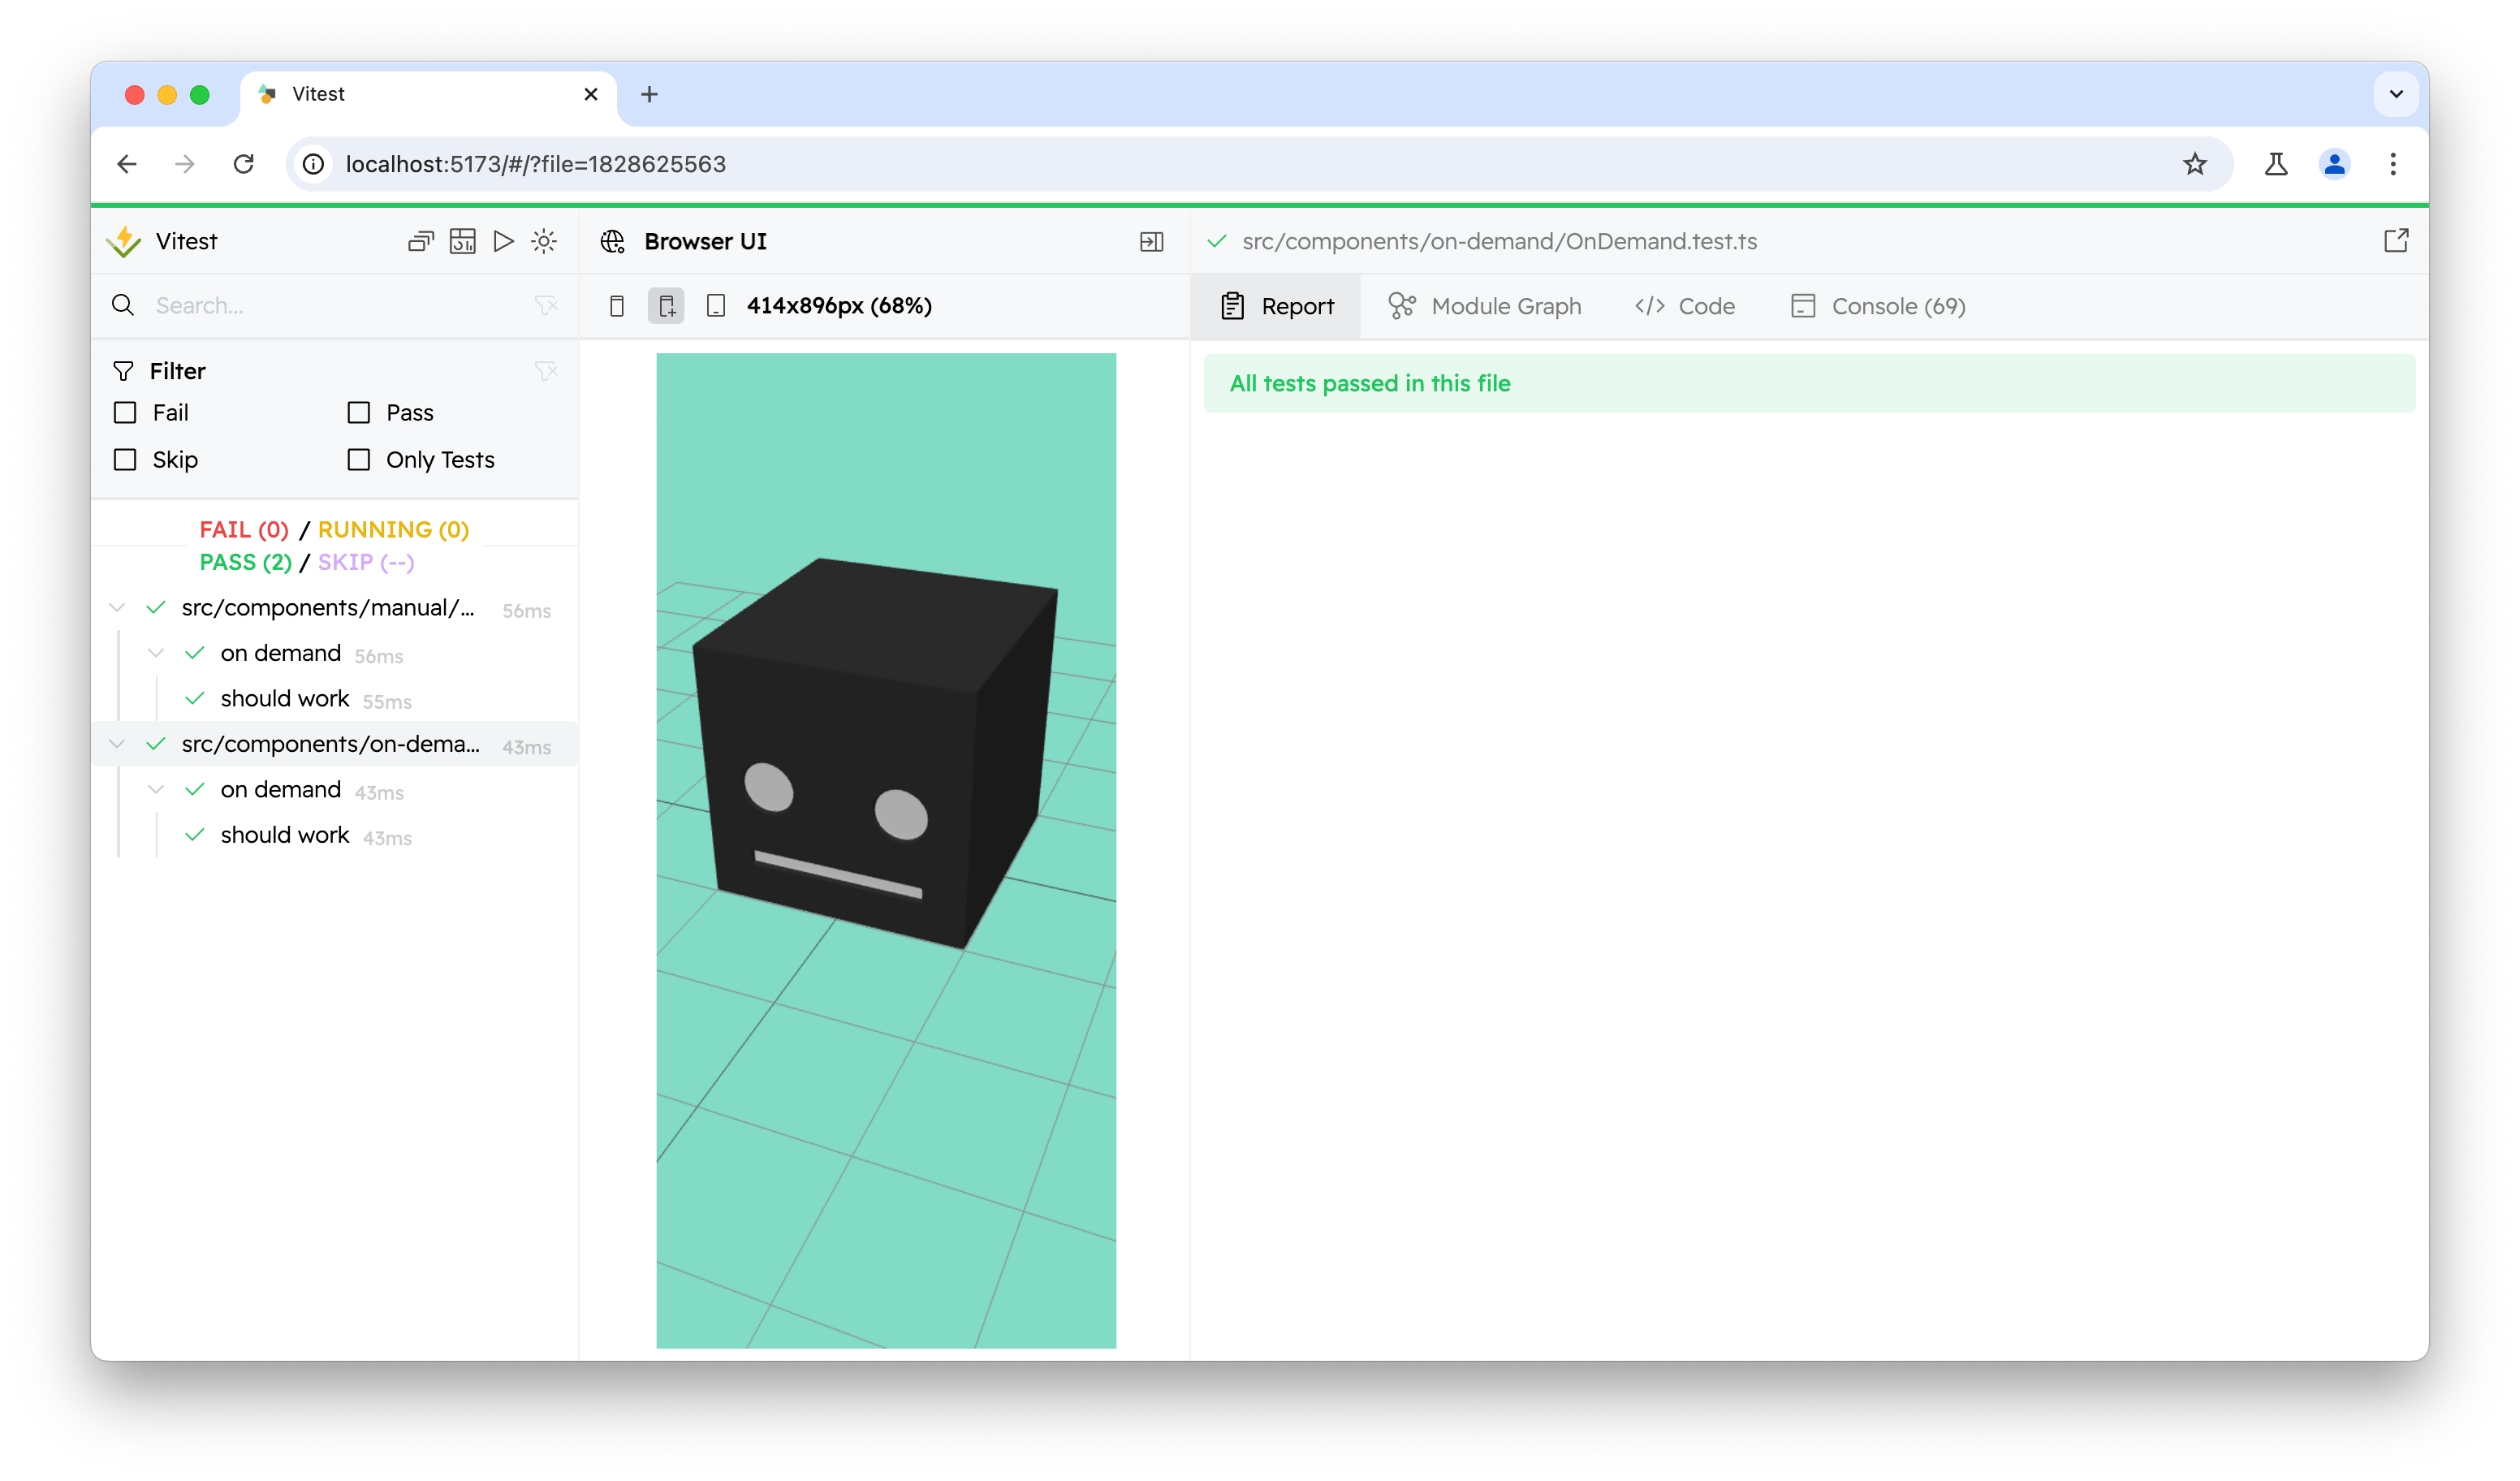
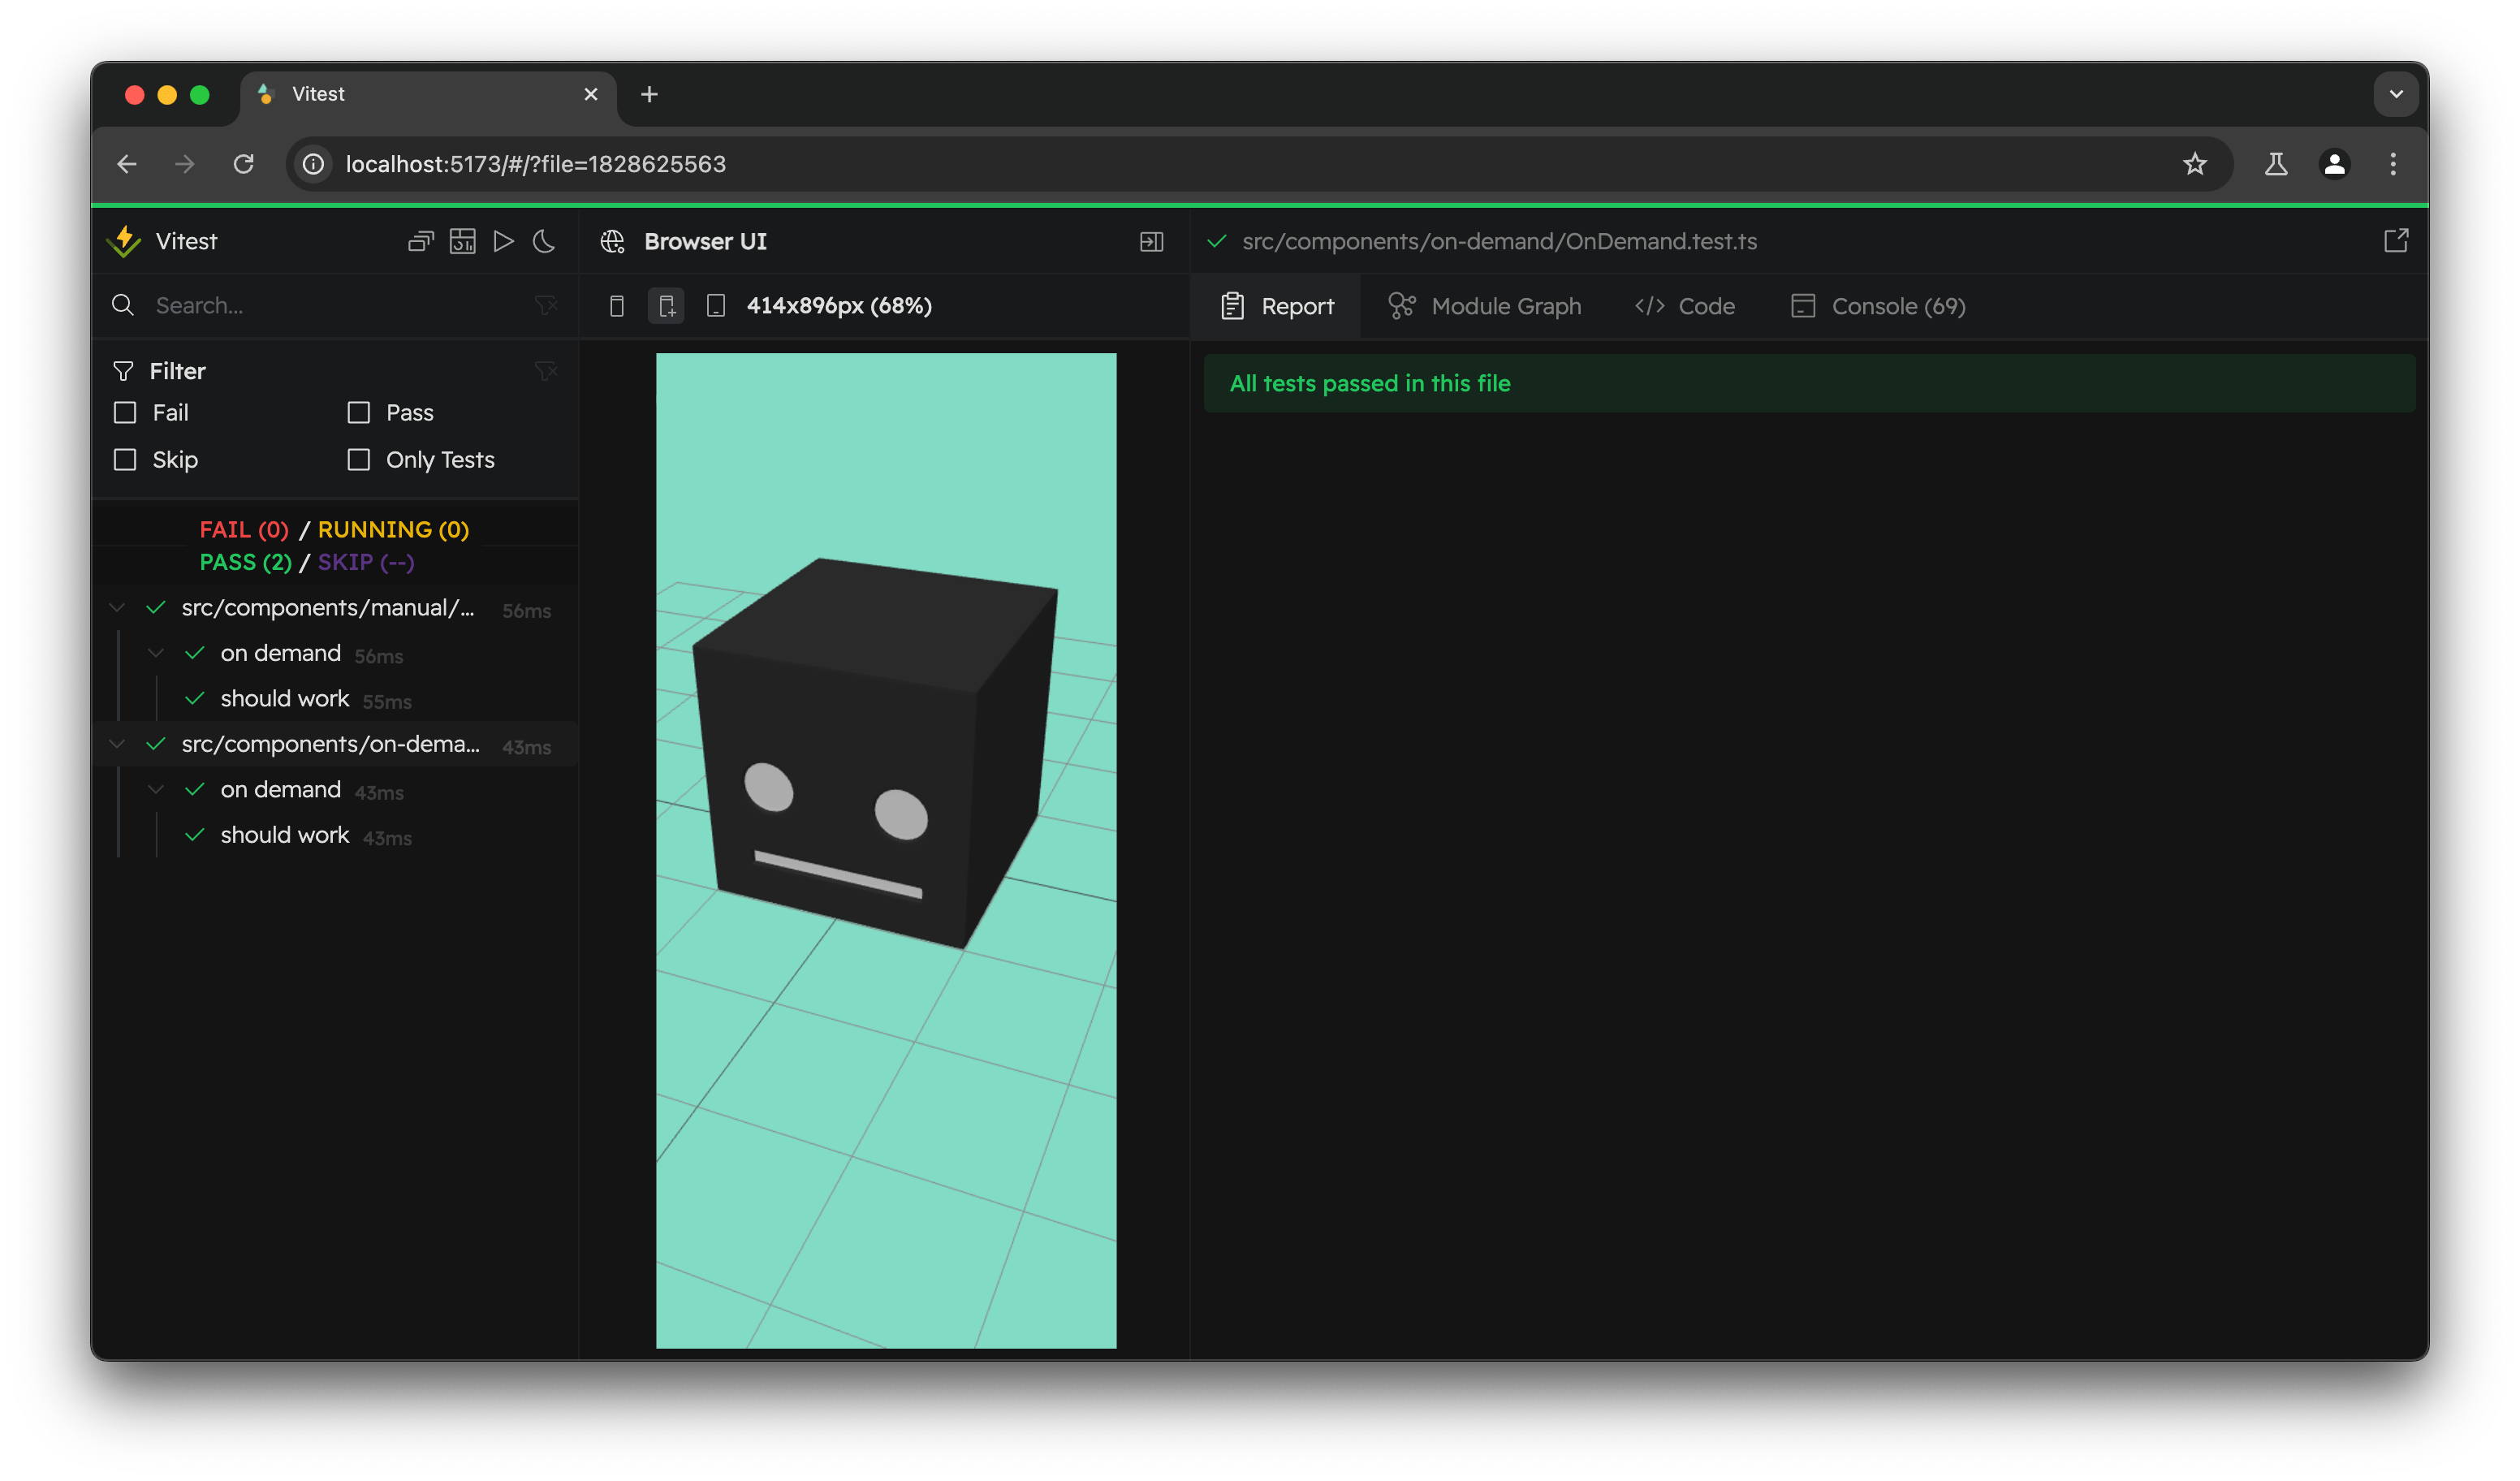
By default, Vitest will automatically open the browser UI for development. Your tests will run inside an iframe in the center. You can configure the viewport by selecting the preferred dimensions, calling page.viewport inside the test, or setting default values in the config.
Headless
Headless mode is another option available in the browser mode. In headless mode, the browser runs in the background without a user interface, which makes it useful for running automated tests. The headless option in Vitest can be set to a boolean value to enable or disable headless mode.
When using headless mode, Vitest won't open the UI automatically. If you want to continue using the UI but have tests run headlessly, you can install the @vitest/ui package and pass the --ui flag when running Vitest.
Here's an example configuration enabling headless mode:
import { defineConfig } from 'vitest/config'
import { playwright } from '@vitest/browser-playwright'

export default defineConfig({
  test: {
    browser: {
      provider: playwright(),
      enabled: true,
      headless: true,
    },
  }
})
You can also set headless mode using the --browser.headless flag in the CLI, like this:
npx vitest --browser.headlessIn this case, Vitest will run in headless mode using the Chrome browser.
WARNING
Headless mode is not available by default. You need to use either playwright or webdriverio providers to enable this feature.
Examples
By default, you don't need any external packages to work with the Browser Mode:
import { expect, test } from 'vitest'
import { page } from 'vitest/browser'
import { render } from './my-render-function.js'

test('properly handles form inputs', async () => {
  render() // mount DOM elements

  // Asserts initial state.
  await expect.element(page.getByText('Hi, my name is Alice')).toBeInTheDocument()

  // Get the input DOM node by querying the associated label.
  const usernameInput = page.getByLabelText(/username/i)

  // Type the name into the input. This already validates that the input
  // is filled correctly, no need to check the value manually.
  await usernameInput.fill('Bob')

  await expect.element(page.getByText('Hi, my name is Bob')).toBeInTheDocument()
})
However, Vitest also provides packages to render components for several popular frameworks out of the box:
vitest-browser-vueto render vue componentsvitest-browser-svelteto render svelte componentsvitest-browser-reactto render react componentsvitest-browser-angularto render Angular components
Community packages are available for other frameworks:
vitest-browser-litto render lit componentsvitest-browser-preactto render preact componentsvitest-browser-qwikto render qwik components
If your framework is not represented, feel free to create your own package - it is a simple wrapper around the framework renderer and page.elementLocator API. We will add a link to it on this page. Make sure it has a name starting with vitest-browser-.
Besides rendering components and locating elements, you will also need to make assertions. Vitest forks the @testing-library/jest-dom library to provide a wide range of DOM assertions out of the box. Read more at the Assertions API.
import { expect } from 'vitest'
import { page } from 'vitest/browser'
// element is rendered correctly
await expect.element(page.getByText('Hello World')).toBeInTheDocument()
Vitest exposes a Context API with a small set of utilities that might be useful to you in tests. For example, if you need to make an interaction, like clicking an element or typing text into an input, you can use userEvent from vitest/browser. Read more at the Interactivity API.
import { page, userEvent } from 'vitest/browser'
await userEvent.fill(page.getByLabelText(/username/i), 'Alice')
// or just locator.fill
await page.getByLabelText(/username/i).fill('Alice')import { render } from 'vitest-browser-vue'
import Component from './Component.vue'
test('properly handles v-model', async () => {
const screen = render(Component)
// Asserts initial state.
await expect.element(screen.getByText('Hi, my name is Alice')).toBeInTheDocument()
// Get the input DOM node by querying the associated label.
const usernameInput = screen.getByLabelText(/username/i)
// Type the name into the input. This already validates that the input
// is filled correctly, no need to check the value manually.
await usernameInput.fill('Bob')
await expect.element(screen.getByText('Hi, my name is Bob')).toBeInTheDocument()
})import { render } from 'vitest-browser-svelte'
import { expect, test } from 'vitest'
import Greeter from './greeter.svelte'
test('greeting appears on click', async () => {
const screen = render(Greeter, { name: 'World' })
const button = screen.getByRole('button')
await button.click()
const greeting = screen.getByText(/hello world/iu)
await expect.element(greeting).toBeInTheDocument()
})import { render } from 'vitest-browser-react'
import Fetch from './fetch'
test('loads and displays greeting', async () => {
// Render a React element into the DOM
const screen = render(<Fetch url="/greeting" />)
await screen.getByText('Load Greeting').click()
// wait before throwing an error if it cannot find an element
const heading = screen.getByRole('heading')
// assert that the alert message is correct
await expect.element(heading).toHaveTextContent('hello there')
await expect.element(screen.getByRole('button')).toBeDisabled()
})import { render } from 'vitest-browser-lit'
import { html } from 'lit'
import './greeter-button'
test('greeting appears on click', async () => {
const screen = render(html`<greeter-button name="World"></greeter-button>`)
const button = screen.getByRole('button')
await button.click()
const greeting = screen.getByText(/hello world/iu)
await expect.element(greeting).toBeInTheDocument()
})import { render } from 'vitest-browser-preact'
import { createElement } from 'preact'
import Greeting from '.Greeting'
test('greeting appears on click', async () => {
const screen = render(<Greeting />)
const button = screen.getByRole('button')
await button.click()
const greeting = screen.getByText(/hello world/iu)
await expect.element(greeting).toBeInTheDocument()
})import { render } from 'vitest-browser-qwik'
import Greeting from './greeting'
test('greeting appears on click', async () => {
// renderSSR and renderHook are also available
const screen = render(<Greeting />)
const button = screen.getByRole('button')
await button.click()
const greeting = screen.getByText(/hello world/iu)
await expect.element(greeting).toBeInTheDocument()
})Vitest doesn't support all frameworks out of the box, but you can use external tools to run tests with these frameworks. We also encourage the community to create their own vitest-browser wrappers - if you have one, feel free to add it to the examples above.
For unsupported frameworks, we recommend using testing-library packages:
@solidjs/testing-libraryto render solid components@marko/testing-libraryto render marko components
You can also see more examples in browser-examples repository.
WARNING
testing-library provides a package @testing-library/user-event. We do not recommend using it directly because it simulates events instead of actually triggering them - instead, use userEvent imported from vitest/browser that uses Chrome DevTools Protocol or Webdriver (depending on the provider) under the hood.
// based on @testing-library/solid API
// https://testing-library.com/docs/solid-testing-library/api

import { render } from '@testing-library/solid'

it('uses params', async () => {
  const App = () => (
    <>
      <Route
        path="/ids/:id"
        component={() => (
          <p>
            Id:
            {useParams()?.id}
          </p>
        )}
      />
      <Route path="/" component={() => <p>Start</p>} />
    </>
  )
  const { baseElement } = render(() => <App />, { location: 'ids/1234' })
  const screen = page.elementLocator(baseElement)

  await expect.screen(screen.getByText('Id: 1234')).toBeInTheDocument()
})// based on @testing-library/marko API
// https://testing-library.com/docs/marko-testing-library/api
import { render, screen } from '@marko/testing-library'
import Greeting from './greeting.marko'
test('renders a message', async () => {
const { baseElement } = await render(Greeting, { name: 'Marko' })
const screen = page.elementLocator(baseElement)
await expect.element(screen.getByText(/Marko/)).toBeInTheDocument()
expect(container.firstChild).toMatchInlineSnapshot(`
<h1>Hello, Marko!</h1>
`)
})Limitations
Thread Blocking Dialogs
When using Vitest Browser, it's important to note that thread blocking dialogs like alert or confirm cannot be used natively. This is because they block the web page, which means Vitest cannot continue communicating with the page, causing the execution to hang.
In such situations, Vitest provides default mocks with default returned values for these APIs. This ensures that if the user accidentally uses synchronous popup web APIs, the execution would not hang. However, it's still recommended for the user to mock these web APIs for a better experience. Read more in Mocking.
Spying on Module Exports
Browser Mode uses the browser's native ESM support to serve modules. The module namespace object is sealed and can't be reconfigured, unlike in Node.js tests where Vitest can patch the Module Runner. This means you can't call vi.spyOn on an imported object:
import { vi } from 'vitest'
import * as module from './module.js'

vi.spyOn(module, 'method') // ❌ throws an error
To bypass this limitation, Vitest supports { spy: true } option in vi.mock('./module.js'). This will automatically spy on every export in the module without replacing them with fake ones.
import { vi } from 'vitest'
import * as module from './module.js'

vi.mock('./module.js', { spy: true })

vi.mocked(module.method).mockImplementation(() => {
  // ...
})
However, the only way to mock exported variables is to export a method that will change the internal value:
export let MODE = 'test'
export function changeMode(newMode) {
  MODE = newMode
}import { expect } from 'vitest'
import { changeMode, MODE } from './module.js'
changeMode('production')
expect(MODE).toBe('production')